
“What exactly am I supposed to clean an implant with, when a toothbrush and floss were enough for my own teeth?” This question is sometimes raised at the surgery once the prosthetic restoration has been fitted. The answer is not obvious: implant hygiene rests on the same daily actions as caring for natural teeth, but the tools are chosen differently, the technique is different, and one habit carried over from the natural dentition can in fact be risky. What follows is a set of practical instructions — what to clean with, in what order, and how to check the result. The symptoms and treatment of established disease of the tissues around an implant are covered separately.
Key takeaways
- The single most important step is daily cleaning of the interdental spaces with a brush of a size selected at the surgery — brushing alone is not enough.
- Conventional dental floss calls for caution around an implant: on an exposed, roughened surface it can shred and leave fibres beneath the gum.
- Bleeding during cleaning is not a reason to stop — with regular hygiene it usually diminishes, although cleaning alone is not always enough for it to resolve completely.
- The size of an interdental brush is not a matter of preference: one that is too small does not clean, one that is too large damages the tissues.
- The whole routine takes two to three minutes a day on top of brushing itself.
Why implant hygiene differs from caring for your own teeth
A natural tooth is not fused to bone — it is suspended in its socket by the periodontal ligament (a richly vascularised ligament that cushions chewing forces and acts as a reservoir of immune cells). An implant is seated directly in bone, through osseointegration (the durable fusion of the fixture with bone).
The soft tissues attach differently too. Around a tooth, collagen fibres insert perpendicularly into the root cementum, forming a kind of fastened collar; around an implant they run parallel to the surface of the fixture, and there are fewer blood vessels there. Inflammation therefore meets weaker resistance and advances towards the bone more quickly.
There is one practical conclusion: with an implant there is no margin for habits that are only “more or less” good. Three weeks without cleaning are enough for mucosal inflammation to develop around an implant — and the return of the tissues to health takes longer than the neglect itself. Nor will pain give any warning, because inflammation of the tissues around an implant, like periodontitis around natural teeth, is usually painless.
When to stop managing it yourself and book an appointment
Three signals call for contact with the surgery rather than a change of brush: purulent discharge from beneath the gum, exposure of the metal part of the fixture together with marked gingival recession and mobility of the crown, bridge or entire restoration. Each of these means that the process has gone beyond what home hygiene can control — and the last may be a sign that the fixture has lost its connection with bone.
Bleeding and redness of the gum are an earlier and far more common signal — how to respond to it is described below. If you are looking for information on the diagnosis and treatment of the disease itself, we have gathered it in the article on peri-implantitis symptoms and treatment — that is, inflammation of the tissues around an implant combined with progressive bone loss.
Implant hygiene at home — tools and technique
Daily cleaning accounts for the greater part of the preventive effect. This is visible in the design of studies on the treatment of peri-implant mucositis: hygiene instruction is the baseline intervention for all participants, and in-surgery procedures are assessed as an addition to it — not the other way round.
Where to begin
Several small randomised studies point to an advantage in cleaning the interdental spaces before brushing — less plaque between the teeth and better fluoride retention — although the most recent and longest of them did not confirm the difference. In practice, it is worth starting with the interdental spaces for a simpler reason as well: this is the step that is dropped first when time runs short. What matters more, however, is doing it every day than the order in which it is done.
Brushing
Twice a day, with a fluoride toothpaste and a soft-bristled brush. Electric brushes — particularly oscillating-rotating ones — remove somewhat more plaque and control inflammation slightly better, but the difference is small; a manual brush used well is effective too. Technique and time count for more than the motor.
The critical area is the gingival margin around the crown: this is where the biofilm accumulates — a layer of bacteria adhering to the surface — which initiates inflammation. The bristles are angled at about 45 degrees to the gum line and worked in short, gentle strokes. Beyond a certain point, firmer pressure no longer improves the result, and very forceful brushing can actually reduce effectiveness and irritate the gum.
Interdental spaces — the most important step
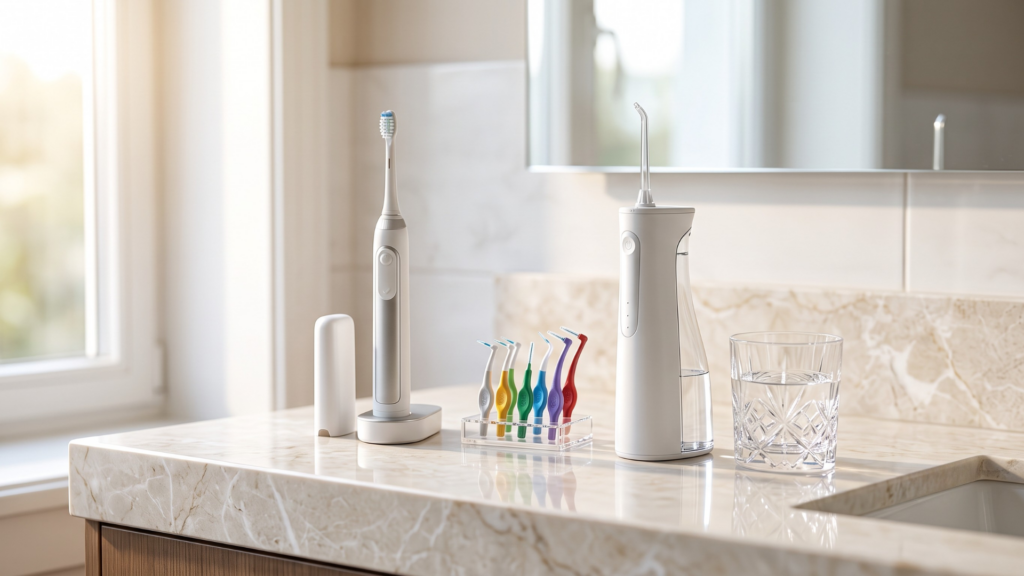
A toothbrush does not reach the approximal surfaces, and it is these that are the most common starting point for inflammation. In implant hygiene, interdental brushes are usually the first choice — provided the size is selected by a hygienist or dentist.
The technique comes down to three movements: the brush is inserted without force, perpendicular to the space; a few unhurried movements back and forth follow; then it is withdrawn and you move on. A correctly sized brush enters with slight resistance and fills the space — if it has to be pushed in, it is too large; if it slides in loosely, it is too small and merely displaces the plaque.
Different sizes may be appropriate in different parts of the mouth. This is normal and worth asking about when the set is being selected.
When the brush will not go in
Sometimes the space is too narrow or the approach too tortuous. In that case there are three solutions, in this order: the smallest available brush size, a brush with a flexible neck that can be bent to an angle, and only as a last resort floss designed for implants. What not to do: do not force the space open with a larger size, and do not give up on cleaning that site — a skipped approximal space is the most common starting point for inflammation.
A single-tufted brush is also useful — a small head with one tuft of bristles, reaching the neck of the restoration from the lingual and palatal aspects, where an ordinary brush merely slides past.
Dental floss — a tool that calls for caution
Conventional floss can shred on roughened surfaces and leave fibres in the pocket which, as described in several case series, may itself sustain inflammation. If you use floss, it should be floss designed for implants, guided in a C-shape around the abutment rather than in a sawing up-and-down motion.
Oral irrigators and mouthwashes
An oral irrigator helps where access is difficult — beneath bridge pontics and around full-arch restorations. It removes plaque less well than a brush and does not replace brushing, but in some studies it reduces bleeding as effectively as floss.
Chlorhexidine mouthwashes are used short-term, as directed by the dentist — prolonged use causes staining and taste disturbance.
Four errors of technique seen most often
In our day-to-day clinical practice at Modern Dental & Orthodontics (Klinika MDO) we find that the problem is not a lack of effort on the patient’s part, but four recurring details of execution:
- Sawing with floss up and down instead of wrapping it around the abutment — this increases the risk of forcing fibres beneath the gum.
- Forcing in an oversized brush in the belief that it “cleans better” — this damages the interdental papilla.
- Scrubbing the gingival margin under pressure — this encourages recession and does not remove plaque any better.
- Cleaning only from the buccal side — the lingual and palatal aspects are omitted entirely, and it is precisely the lingual surfaces of the lower front teeth that are among the sites where calculus builds up fastest.
It bleeds, so I stop cleaning — the most common mistake
The sequence is typical: the patient starts cleaning the interdental spaces, the gum bleeds, and so they leave that site alone, convinced they are doing themselves harm. In fact the bleeding means the inflammation was already there — the brush merely revealed it. With consistent cleaning, the first improvement is often visible after one to two weeks, but a full assessment takes several weeks.
A practical rule: a bleeding site is cleaned more gently, but no less often. A complete absence of improvement after two to three weeks is a signal to book an appointment, not to give up.
How to check whether you are really cleaning properly
Self-assessment can be misleading, so it is worth reaching for an objective test. Plaque- disclosing tablets, available without prescription, help you to see the sites that have been missed — simply use them in the evening after brushing. A second test: after two to three weeks of systematic cleaning, bleeding on touch should be markedly reduced.
Matching the tools to the clinical situation
There is no single set that is right for everything. Implant hygiene looks different with a single crown, different beneath a bridge, and different again with a restoration spanning the whole arch — and it is matching the tool to the situation, rather than the number of accessories purchased, that determines the result. Treat the summary below as a starting point for a conversation at the surgery.
| Situation | Primary tool | In addition | What to watch for |
| Single crown on an implant | interdental brush sized at the surgery | single-tufted brush for the gingival margin | do not scrub the gingival margin under pressure |
| Implant-supported bridge | interdental brush plus tape or superfloss beneath the pontic | oral irrigator | the space beneath the pontic needs a separate pass |
| All-on-4 / All-on-6 | superfloss drawn beneath the entire restoration | brushes with an angled head, oral irrigator | brushing from the outside does not reach beneath the restoration |
| Very narrow approximal space | smallest size of interdental brush | floss designed for implants | do not force the space open with a larger size |
| Recession, exposed roughened part of the fixture | soft toothbrush and interdental brush | oral irrigator | avoid conventional floss — it shreds on the textured surface |
The last row calls for a word of explanation. The surface of the fixture is not smooth — its microstructure is designed to promote fusion with bone. As long as it remains hidden beneath the gum, this has no bearing on hygiene. Once bone loss exposes it, thorough cleaning becomes more difficult, because bacteria persist in the recesses — and that is precisely when tools are selected more cautiously.
Risk factors that weaken the effect of hygiene
Implant hygiene does not work in a vacuum. Smoking alters the composition of the bacteria in the mouth and weakens the response to treatment of inflammation; poorly controlled diabetes promotes inflammation and impairs healing; a history of periodontitis markedly raises the risk of peri-implant disease, which is why guidelines recommend bringing it to a stable outcome before implants are placed. The most underestimated factor, however, is the simple absence of follow- up: in a study of patients who remained outside regular supportive care, peri-implantitis was found in roughly one in four of them. The design of the prosthetic restoration is a separate category — no tool will rescue a restoration that cannot be cleaned. We write in more detail about everyday habits in our article on what to avoid when you have dental implants.
Supportive care visits — what to arrange
Guidelines recommend that every patient with implants remains in an individually planned programme of supportive care; in practice the interval is most often three to six months and should not exceed a year. The visit does not serve cleaning alone, however — it is also the moment at which it is verified whether home implant hygiene is actually working, and at which the choice of tools is corrected.
Five questions worth asking at your appointment
The instruction “please clean thoroughly” is too general. These questions turn it into something concrete:
- What interdental brush size is right for me — and do I need different sizes in different places?
- Is my restoration screw-retained or cement-retained? With cement-retained work it is worth asking whether all excess cement was removed from beneath the gum.
- Are there sites I systematically fail to clean? The hygienist can see them at the appointment and can show you in a mirror.
- What interval between visits is right for my level of risk? The answer “every six months” need not apply to you specifically.
- Can my restoration be removed periodically and cleaned? This matters especially with restorations spanning the whole arch.
Implant hygiene checklist
Every day:
- cleaning the interdental spaces with a brush of a size selected at the surgery;
- brushing twice a day, with particular attention to the gingival margin around the crown and to the lingual aspect;
- an oral irrigator in areas of difficult access, if one has been recommended;
- a brief visual check: whether the gum is bleeding or reddened.
Every few weeks:
- replacing the brush or brush head with a new one;
- checking whether the interdental brush still enters freely — resistance or looseness means a change of size;
- a check with plaque-disclosing tablets.
The first 30 days after the prosthetic restoration is fitted:
- ask for the interdental brush size to be selected before you leave the surgery — this is the best moment;
- for the first week, clean the interdental spaces especially gently, expecting some bleeding;
- after two weeks, check whether the bleeding has resolved; if it has not, report it at your follow-up appointment;
- in the fourth week, carry out your first check with disclosing tablets, to catch the sites that have been missed from the outset.
At the surgery, at every supportive care visit:
- assessment of bleeding and measurement of pocket depth, compared with the previous result;
- removal of deposits with instruments matched to the implant surface;
- inspection of the prosthetic restoration: marginal seal, screw tightness, absence of excess cement;
- repeat instruction and verification of the choice of tools.
Full-arch restorations — different tools, the same principle
When a whole arch is restored on four or six fixtures, the principles of implant hygiene remain the same, but the conditions are harder: the framework covers a larger surface, and the space between the restoration and the gum can be narrow and invisible to the patient. The fixtures themselves survive in the majority of cases — in follow-up extending over more than a decade, survival at implant level was 97.4% in the maxilla and 98.9% in the mandible — but studies of immediate restorations recorded biological complications and progressive marginal bone loss, reaching about 2 mm after ten years.
The space beneath the restoration is the critical one, and this is where the whole technique is concentrated. Tape or superfloss is drawn beneath the pontic from the buccal to the lingual side, in one unhurried movement per segment — the stiff end makes insertion easier, and the spongy section wraps around the abutment. The same caveat as with conventional floss remains in force: if the threads of the fixture are exposed, the floss may shred and is better replaced with a brush. Interdental brushes are chosen with an angled head, because a straight one does not reach beneath the framework. An oral irrigator matters more here than with a single crown, though it still remains an adjunct — it has not been shown to remove mature biofilm completely.
The third issue is one of design and is settled long before the first cleaning. An analysis of biological complications in extensive restorations, published in 2023 in the Journal of Oral and Maxillofacial Surgery, identifies access for hygiene as the overriding criterion in designing the restoration — one to which the distribution of the fixtures is subordinated. Some frameworks are made so that the clinician can periodically remove them and clean the surfaces the patient cannot reach; it is worth asking about this possibility before the restoration is made, rather than years later. In treating patients at our practice in Wola, Warsaw, we pay attention to ensuring that the shape of the restoration can be cleaned with home tools — we discuss this as early as the stage of planning implant treatment. The stages of the treatment itself are described in our comprehensive guide to dental implants.
Frequently asked questions
What size of interdental brush should I choose?
One that enters the space with slight resistance and fills it. Too small and it cleans less thoroughly; too large and it compresses and irritates the interdental papilla each time it is inserted. The size is selected by a hygienist or dentist, and is often different in different parts of the mouth — which is why it is not worth buying a set by guesswork, but rather asking for it to be fitted at an appointment.
Is dental floss safe around an implant?
Conventional floss can shred on a roughened surface and leave fibres beneath the gum, which has been described as a cause of persistent inflammation. A safer first choice is an interdental brush; and if floss is used, it should be floss designed for implants, guided in a C-shape around the abutment, never in a sawing up-and-down motion.
Will an oral irrigator replace an interdental brush?
It will not. A jet of water removes plaque less well than mechanical cleaning, although in some studies it reduces gingival bleeding as effectively as floss. It works best where access is limited: beneath bridge pontics and around full-arch restorations. Treat it as an addition to the routine, not a shortcut.
How often are check-ups needed after an implant?
Most often every three to six months, and no less than once a year. With smoking, poorly controlled diabetes or a history of periodontitis, the interval usually shortens to three or four months. The date is set by the dentist on the basis of an individual risk assessment rather than a fixed calendar, and it may be changed over the course of follow-up.
Can implants be whitened or air-polished?
Whitening agents do not change the colour of ceramic or titanium, so they will have no effect on an implant-supported restoration — this also applies to whitening toothpastes, which act abrasively and, in laboratory studies, dulled the ceramic surface. Air polishing is possible, but the type of powder and of the nozzle is matched to the type of prosthetic restoration.
Does smoking after implant placement really matter?
Yes. Smoking is among the best-documented factors that worsen the condition of the tissues around a fixture and the response to treatment of inflammation. Cutting down or giving up the habit does lower the risk of complications in real terms, even many years after the procedure — and in smokers, consistency of hygiene and shorter intervals between visits are of particular importance.
Summary
Implant hygiene comes down to one task performed well: daily cleaning of the interdental spaces with a brush of the correct size, supplemented by brushing the gingival margin. The rest — the irrigator, mouthwashes, the choice of toothpaste — is of secondary importance in implant hygiene. If the gum bleeds, that is a sign to clean more thoroughly, not less often. And if the brush will not go in, or you do not know which size is right, that is a question for your next appointment, not something to settle at the pharmacy.
Read more:
- Implant treatment at Modern Dental & Orthodontics (Klinika MDO)
- Prosthodontics
- Peri-implantitis — inflammation around an implant. Symptoms and treatment
- What to avoid when you have dental implants
- Dental implants — a comprehensive guide to the stages of treatment
- How long does it take to heal after a dental implant? Osteointegration step by step
Content and liability disclaimer
This article is informational and educational in nature and does not constitute medical advice, a diagnosis or a therapeutic recommendation — it does not replace a consultation with a specialist. If you are experiencing symptoms, have doubts or are facing a decision about treatment, consult a dentist. The methods described and the data cited are general in nature. The results of scientific studies relate to populations, not to an individual patient. The course and outcome of therapy depend on the individual clinical situation and may vary between patients. No information contained in this article constitutes a guarantee of result. The content has been prepared with due care, based on publicly available medical knowledge and the scientific publications indicated in the Sources section. We do not advise taking or refraining from any health-related action solely on the basis of the content of this article, without prior consultation with a doctor.
Sources
Source 1
Links https://doi.org/10.1111/jcpe.13823 │ https://pubmed.ncbi.nlm.nih.gov/37271498/
Description Herrera D, Berglundh T, Schwarz F, et al. „Prevention and treatment of peri-implant diseases — The EFP S3 level clinical practice guideline.” Journal of Clinical Periodontology. 2023;50 Suppl 26:4-76.
Source 2
Links https://doi.org/10.1016/j.joms.2023.05.008 │ https://pubmed.ncbi.nlm.nih.gov/37301227/
Description Block MS. „Maxillary Full Arch Restorations – Biological Complications: A Narrative Review Outlining Criteria for Long Term Success.” Journal of Oral and Maxillofacial Surgery. 2023;81(9):1124-1134.
Source 3
Links https://doi.org/10.1186/s40729-023-00511-0 │ https://pubmed.ncbi.nlm.nih.gov/37938479/
Description Uesugi T, Shimoo Y, Munakata M, et al. „The All-on-four concept for fixed full-arch rehabilitation of the edentulous maxilla and mandible: a longitudinal study in Japanese patients with 3-17-year follow-up and analysis of risk factors for survival rate.” International Journal of Implant Dentistry. 2023;9(1):43.
Source 4
Links https://doi.org/10.1111/cid.13134 │ https://pubmed.ncbi.nlm.nih.gov/36197040/
Description La Monaca G, Pranno N, Annibali S, et al. „Immediate flapless full-arch rehabilitation of edentulous jaws on 4 or 6 implants according to the prosthetic-driven planning and guided implant surgery: A retrospective study on clinical and radiographic outcomes up to 10 years of follow-up.” Clinical Implant Dentistry and Related Research. 2022;24(6):831-844.
Source 5
Links https://doi.org/10.1111/jcpe.70012 │ https://pubmed.ncbi.nlm.nih.gov/40830824/
Description Maal MB, Bueno J, Koldsland OC, Sanz M, Verket A. „Oral Hygiene Reinforcement With or Without Repeated Instrumentation in the Treatment of Peri-Implant Mucositis — A Randomised Controlled Trial.” Journal of Clinical Periodontology. 2025;52(12):1725-1733.
Source 6
Links https://doi.org/10.1007/s00784-024-05673-8 │ https://pubmed.ncbi.nlm.nih.gov/38671152/
Description Ruiz-Romero V, Figueiredo R, Toledano-Serrabona J, et al. „Peri-implantitis in patients without regular supportive therapy: prevalence and risk indicators.” Clinical Oral Investigations. 2024;28(5):278.